Art Projects--Short and Sweet
Most of my Art Project video demonstrations are about five minutes in length. Depending on the project, they take from one or two hours to complete. Perfect for a good time with art in an afternoon.
All are easy, fun, information-rich videos of projects that require simple materials that can be found around the house or easily purchased at your favorite art supply store.
And if you are homeschooling and looking for a great learning experience your kids this is the place for you!
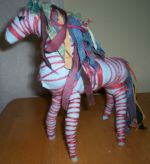
SHORT AND SWEET ART PROJECT -
CREATE A CLOTHES HORSE
Try making a "Clothes Dog," a "Clothes Rabbit," a "Clothes Duck," or whatever, after viewing this video, you can easily translate the "Clothes Horse" form to what even form you want to make.
Go to the "How To Make A Clothes Horse" video
SHORT AND SWEET ART PROJECT - CHALKOLA KID'S WORKSHOP PROJECT
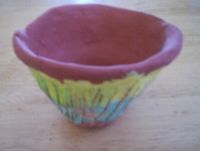
SHORT AND SWEET ART PROJECT -
HOW TO MAKE A PINCH POT
Making a pinch pot is basic to learning how to work with clay and other plastic material used in ceramics and sculpting. Sculpey, which is a clay that can be hardened by baking in an oven. After the pot has been hardened by baking, it can be painted.
Go to the "How To Make A Pinch Pot" video

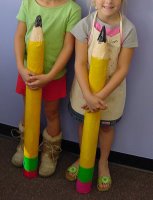
Kathy Barbro's great website for kids' art projects.
These giant pencils were a favorite among students and parents alike last summer in my private art class. The basic shape comes from a mailing tube, which I found at my local moving supply company.
I’m happy to share my personal collection of art projects in hopes that they might encourage the creativity of young and old alike.
--Kathy Barbro
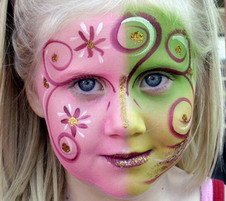
Discover Face Painting
We aim to answer many face-art questions of both beginners and pros, in most languages. You’ll find quality designs, examples, free advice and ideas. You can shop for the items you need. If you love art, you’ll enjoy our tradition, strange and unusual pictures on our example page.
SHORT AND SWEET ART PROJECT -
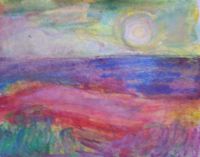
THE BLOT PAINTING TECHNIQUE
Blot painting is ideal for anyone learning how to use acrylic paint, as well as the experienced painter wanting to investigate new painting skills and applications. The blot painting technique invites inspiration and imagination.
Go to the"The Blot Painting" video
SHORT AND SWEET ART PROJECT -
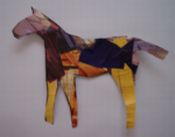
MAKE A PATCHWORK HORSE
All this collage takes is a sheet of sketch book paper, papers cut from newspapers, magazines, packaging, junk mail, etc., a glue stick, a scissor and a black marker. Make a whole herd of Patchwork Horses or try a Patchwork Dog, or Patchwork Bird.
Go to the "How To Make A Patchwork Horse" video
SHORT AND SWEET ART PROJECT -
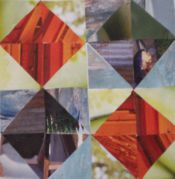
MAKE A PAPER QUILT
All you will need is: several sheets of sketch book paper, papers from magazines, newspapers, junk mail, packaging, etc., a glue stick, scissors, a ruler and a pencil. Once you have made a Paper Quilt using triangles, you may want to explore other geometrical shapes as templates--like diamonds, squares or circles. Looking at a book of traditional quilts is a good way to get ideas.
Go to the "How To Make A Paper Quilt" video

SHORT AND SWEET ART PROJECT -
DRAW YOUR HAND
Look closely and try to get the shape and form of your hand. Do several drawings. No fair putting your hand out flat on the table and tracing around it!
Go to the "Draw Your Hand" video

SHORT AND SWEET ART PROJECT -
DRAW A FLOWER WITH CONTE CRAYON
Conte crayons can be purchased singly or in small set that are relatively inexpensive. For this project you will need a sketch book, a conte crayon, and a kneaded eraser.
Go to the "Draw A Flower With Conte Crayon" video

SHORT AND SWEET ART PROJECT -
DRAW A FLOWER WITH COLORED PENCILS
My favorite brand of colored pencils is Prismacolor. They come in small sets that are fairly inexpensive. Just a sketch book and a small set of Prismacolor will get you hooked on drawing with these soft, smooth pencils!
Go to my video on how to "Draw A Flower With Colored Pencils."

SHORT AND SWEET ART PROJECT -
DRAW A FLOWER WITH OIL PASTELS
With a flower as the subject (again!) bright, vibrant color is explored. This exercise works best with good quality oil pastels (a little set of six or twelve is good.) Oil pastels are superior in color density to crayons and can be layered for exciting visual effects.
I have to admit that my kid's class using crayons on construction paper had a lot of fun doing this project, but had they been using oil pastels, the results would have been much better! And of course, when no flower is available, a picture of a flower or even an imaginary flower can be inspiring subject matter also.
Go to my video on how to "Draw A Flower With Oil Pastel."

SHORT AND SWEET ART PROJECT -
DRAW A FLOWER WITH PENCIL
The Gerbera daisy from my garden (again!) was the perfect subject matter for a drawing. This is a great project for beginners as well as more advanced students. I show how to start out, put down the basic shapes and work toward detail.
Practicing this drawing exercise is a great way to begin to draw what you see and requires the student to look closely at the flower, translate it to a basic form, then proceed to go into more detail with the shapes of the petals, the stem and the water container.
I have found that this is also a good project for children and, with a little guidance for shading and making highlights, awesome drawings are made! All that is need here is a sketch book, a soft pencil (like at 2b) and an eraser--a pink pearl, white or kneaded eraser works just fine.
Go to my video on how to "Draw A Flower With Pencil."

SHORT AND SWEET ART PROJECT -
DRAW A HORSE WITH PENCIL
This is a good exercise to do first, before doing the water color and pencil horse because students get some experience in creating the horse-form. I encourage students to feel free to change the horse into their own imaginary animal so that they don't feel bound or intimidated by having to copy a form.
I encourage students to do several, even playing the video again a couple times, then trying the drawing on their own with the idea that they can change the instruction to suit the way they want to do it!
Go to my video on how to "Draw A Horse With Pencil."

SHORT AND SWEET ART PROJECT -
DRAW A HORSE WITH WATER COLOR AND PENCIL
This video will show you how to draw a horse, using simple, circular forms, then adding the horse's legs and head. A simple wash of water color completes the picture.
Working "fast and loose" creates the most exciting horses. We've tried this technique with turtles, birds, fish and dogs. The results are often surprising and encouraging to students when they discover that by working spontaneously, they can create some great stuff!
Although pan colors are OK, I think results are better with tube water colors--and small sets are not expensive. I do think that 140 lb. cold press water color paper is necessary, as sketch book paper absorbs the color, wrinkles and generally produces unhappy results.
Go to my video on how to "Draw A Horse With Water Color And Pencil"
SHORT AND SWEET ART PROJECT -
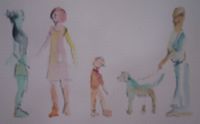
PAINT WATER COLOR PEOPLE
This is a fun project for beginners and more accomplished students alike! Keeping loose and experimenting with brush strokes is fun. I encourage students to fill up five or six sheets of water color paper with all kinds of squiggles, stripes, question marks, etc.
When they are finished, it is time to look carefully at their brushwork and see what images they can find. When they find an image, I ask them to draw it, using a pencil or pen to complete the water color image.
It is amazing what they come up with! We all agree that they never would have thought of doing a water color of a dragon, or a strange tree or marching bugs!
Go to my video on how to "Paint Water Color People"

SHORT AND SWEET ART PROJECT -
PAINT A LANDSCAPE WITH WATER COLOR
Get out your water colors and start splashing! If you have a good quality set of at least twelve tube colors and are working on 140 lb. cold press water color paper, all the better.
I've had fun with kids with this project--using pan water colors or temperas on sketch book paper. If it's a nice day, doing it outside is great. Kids like the idea of not having to worry about messing a table or spilling the water!
But we've had fun indoors, too. On a cold and rainy day, my three young students enjoyed looking at a photo of a landscape on a calendar and doing a landscape mural on a big piece of shelf paper.
Go to my video on how to "Paint A Landscape With Water Color"
Got a Short and Sweet Art Project you would like to share? Contact me!
Real Feedback
I recently visitied your website and saw all of the great work you are doing! This is wonderful.
I would love to learn how to draw and was looking at a link to your basic drawing classes. I am hoping that you could send me the coarse information.
Also, I have a daughter who is very interested in art. She is being homeschooled. She has self-taught herself in painting but I am also looking for any coarse work that I could introduce to her studies as well.
Ericka J.
-----
I just watched your wonderful oil pastel on a photo and your shading video. Thanks so much! I have been struggling with how to work with oil pastels- I have taken some recreational art classes- but the blending on the paper is hard for me to fathom. If you still offer your oil pastel class I would be very interested.
Shelley
-----
Hello again Lois, Sorry I forgot to add that I can draw a bit & that all my art is done by mouth so I’ll need basic, easy instruction that are quick to work with. I hope this doesn’t make things to difficult & I understand if you are unable to help me. Thanks Again Katt
Dear Lois, Thank you for this. I will approach these tasks over the weekend & let you know how I go. Again I thank you for giving me the time to try & achieve my art.
katt
-----
I work for a Recreation & Parks Department and I was online searching for some art projects to use for our summer day camp program (and secretly for myself to satisfy the little artist in me!) I look forward to taking some of your online lessons.
Deb
-----
Hello, I have been drawing portraits lately and feel your crosshatching method has been very helpful! My shading has improved immensely!I will work on the line drawing as soon as I have time! Rose
Notes on Making Videos......
I look back at the first videos I made several years ago and I admit I'm amused at my lengthy dialogues I attached to various demonstrations of painting, drawing and printmaking.
At the onset, I pretty much applied my teaching style to my videos, figuring that a similar method of delivery which worked well with my students would be good for YouTube.
Over the years, however, I have refined my art lesson videos, making them shorter and more concentrated in instruction. I have also migrated away from the lengthy dialogues and let my annotations on the videos explain what I am doing. In this way, I think, hearing impaired viewers will garner just as much from my videos as those that can hear just fine.
Using annotations drew criticisms from some viewers who really wanted a dialogue and description of what I was doing. So, then I quit doing just annotations and went back to talking.
I feel I am still in the process of refinement with my videos. I am often envious of videos with a lot of great music and visuals that I, with my little Flip camcorder, can't produce. Then I think that educational videos need not have a lot of bells and whistles. What they do have to have, and what I strive for is good, simple, solid, information-rich instruction.
Into my sixth years doing YouTube videos, one rather disconcerting factor appears when I review my past videos. I am getting older, AND older. I can actually see myself aging in my videos. What a legacy!
Lois DeWitt